How to Easily Airdrop Tokens on Solana with Solana AirdropSender
« Go back Published on:
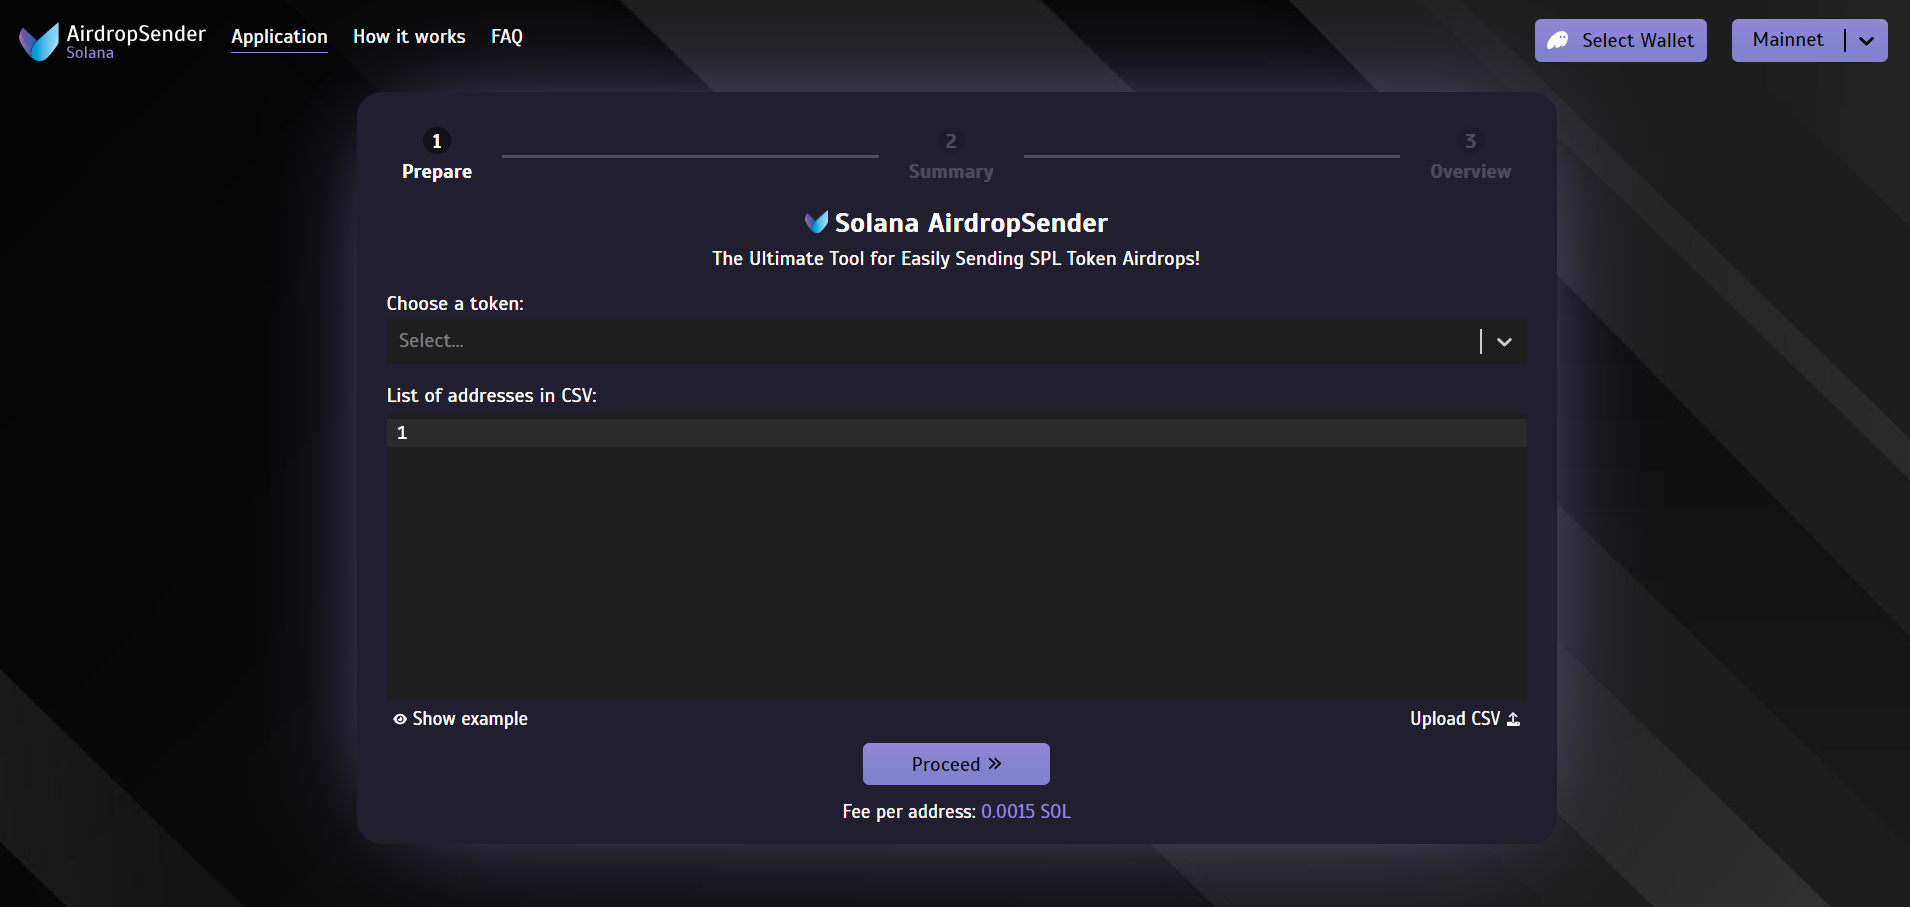
 Step 1: Connect Your Wallet
To start, connect your Solana-compatible wallet, such as Phantom, Solflare, or Torus, through the Solana AirdropSender website. Once connected, you'll see a dropdown displaying all the tokens in your wallet, allowing you to select the token you want to distribute. Enter the amount you wish to send and specify the wallet addresses.
Wallet Addresses: You can upload your list of recipient addresses in a CSV file or paste them directly into the editor. For flexibility, you can either send a fixed amount of tokens to each wallet or customize the amount per wallet by adding an extra column in your CSV file.
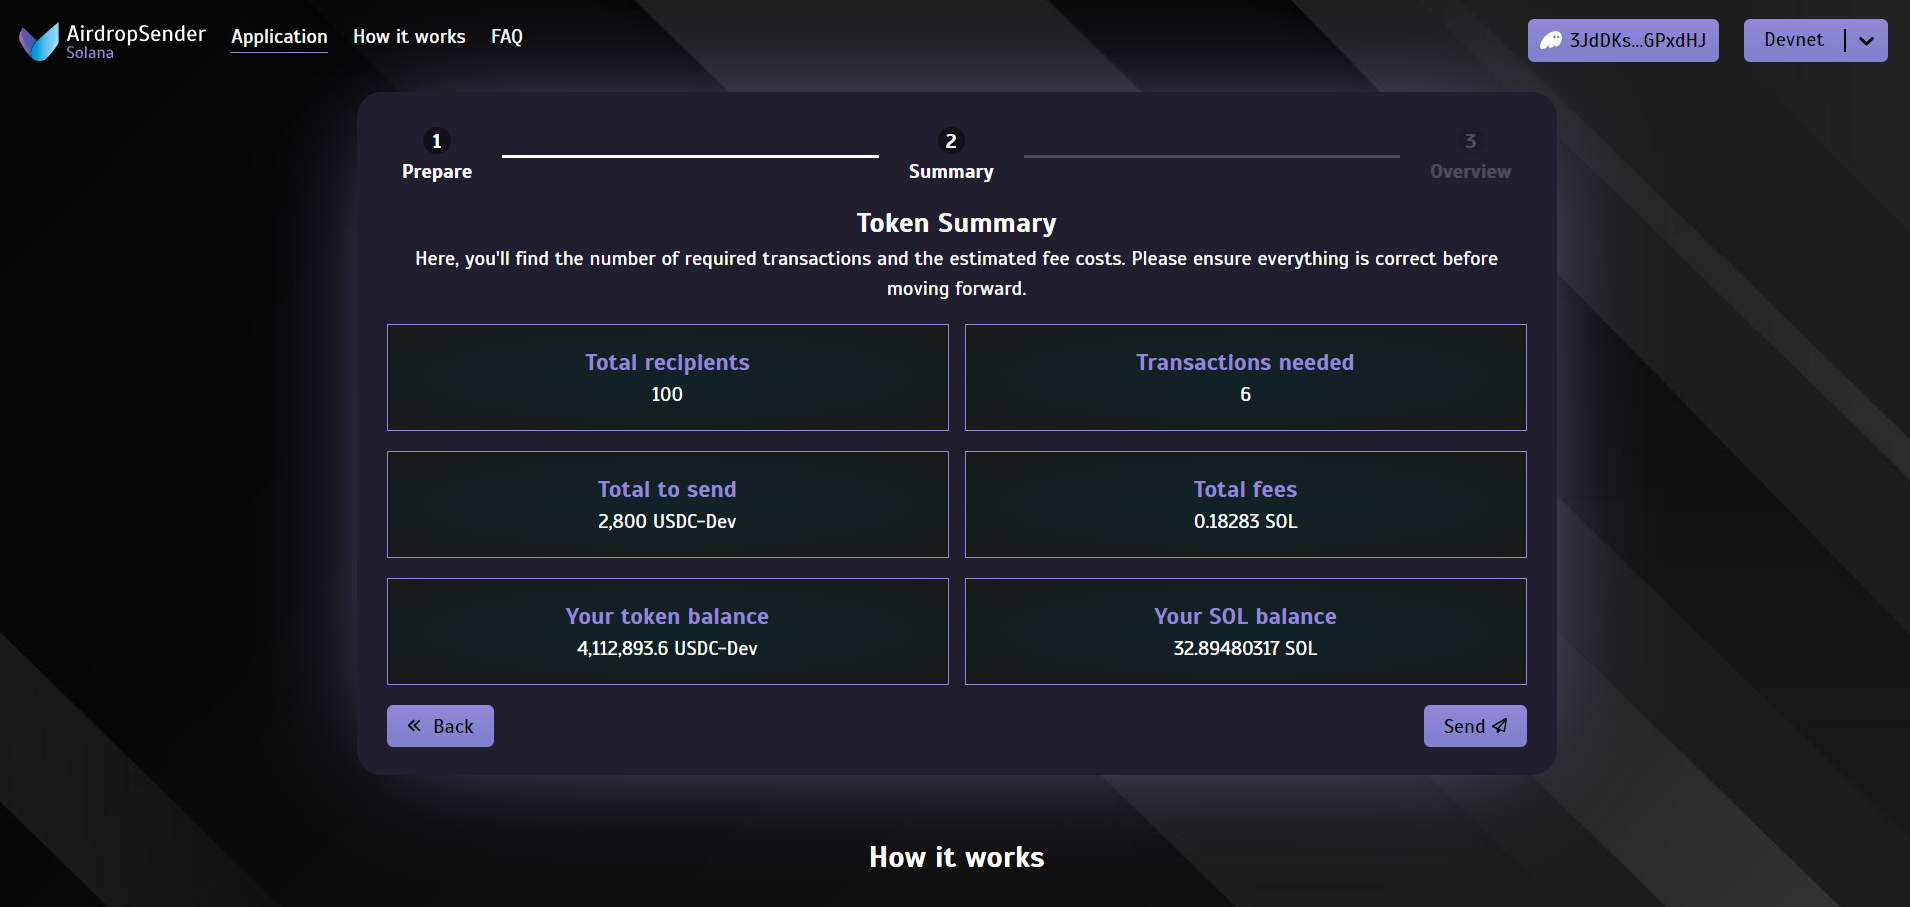
Step 2: Review Summary Details
After entering your details, click on "Proceed" to reach the Summary page, where you'll see six blocks of essential information:
- Total Recipients: The number of wallets receiving tokens.
- Transactions Needed: The number of transactions required for the airdrop.
- Total to Send: The total token amount set for distribution.
- Total Fees: A breakdown of the Solana fees combined with application fees.
- Your Token Balance: Displays your current token balance for the selected token.
- Your SOL Balance: Shows the SOL balance to ensure you have enough to cover fees.
Once everything looks correct, click "Send" to initiate the airdrop process.
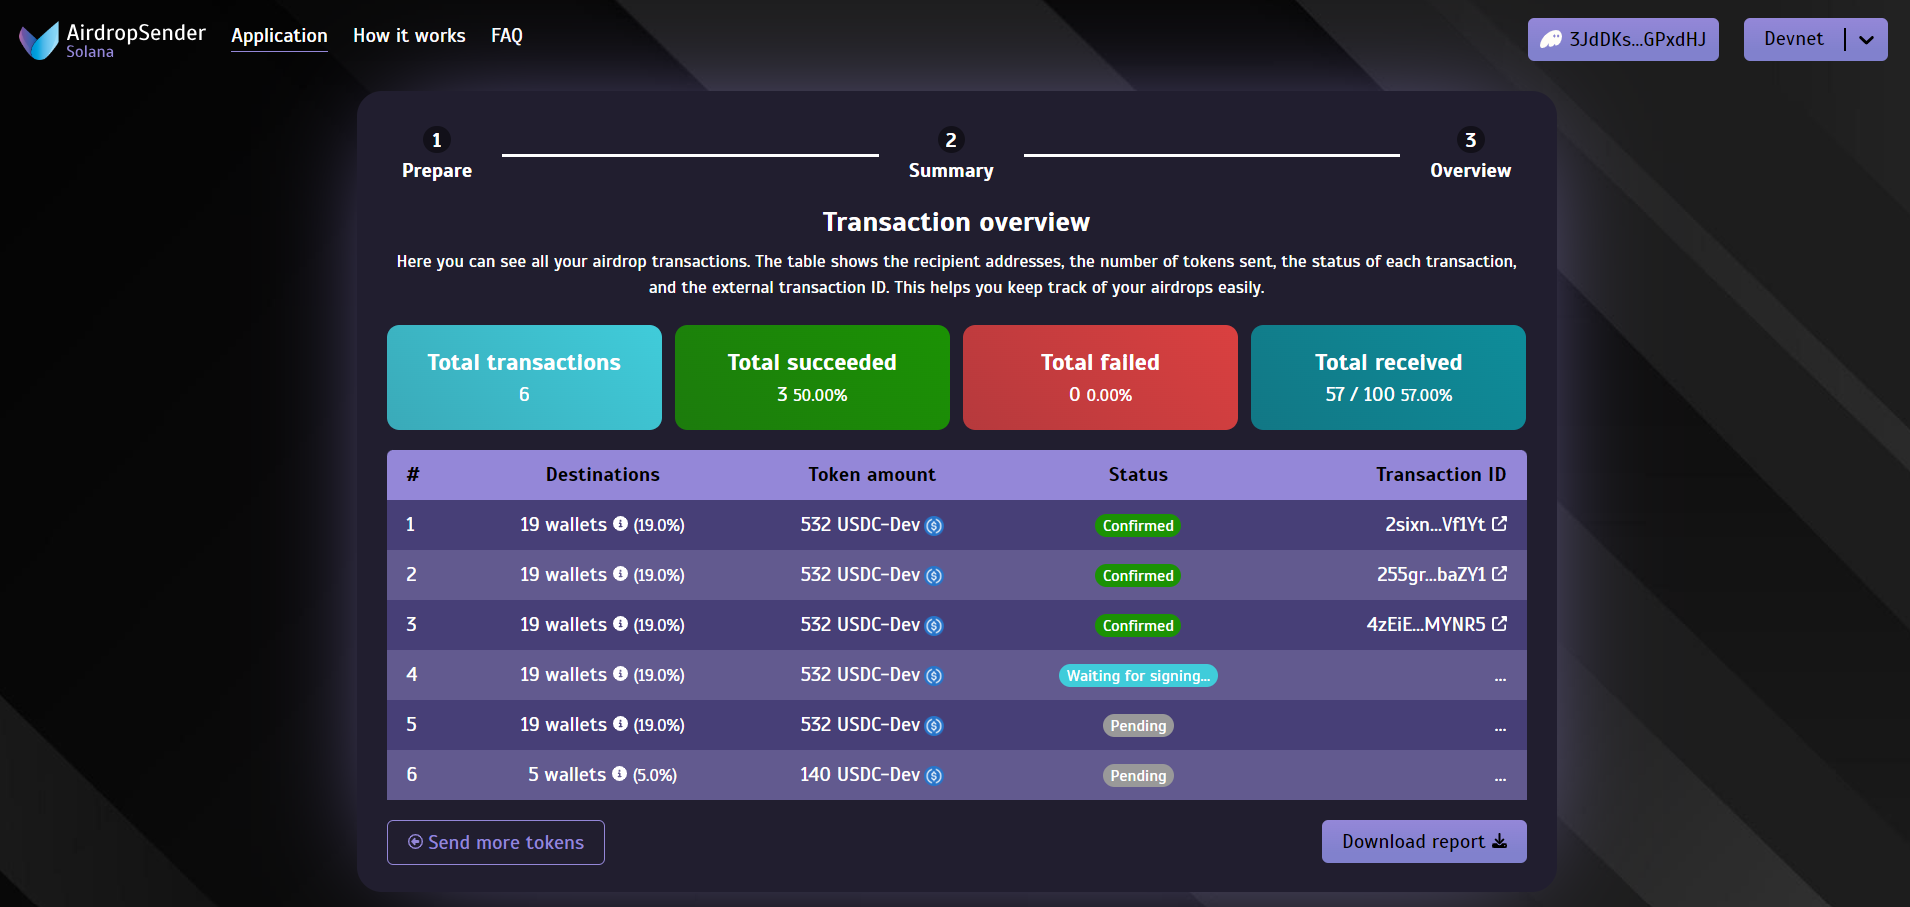
Step 3: Track Transactions in Overview
In the final Overview step, Solana AirdropSender provides a detailed table for tracking each transaction. This table includes:
- # (Transaction Number): The internal ID for tracking.
- Destinations: Number of wallets each transaction covers. Clicking the info icon reveals the specific wallets.
- Token Amount: The total tokens per transaction.
- Status: The current status of each transaction, which can be "Pending," "Waiting for signing," "Confirmed," "Failed," and more.
- Transaction Hash: The Solana transaction hash, along with a link to view transaction details on Solscan.
To complete the airdrop, the application will queue transactions in batches of ten, which are signed through your wallet provider (Phantom, Solflare, etc.). If any signing issues occur, the transaction status updates to "Failed" or "Rejected," and you'll see a Retry failed transactions button to try again.
Once all transactions are successfully signed and confirmed, you can export a report of the completed transactions to a CSV by clicking Download report. If you wish to send additional tokens, simply select Send more tokens to repeat the process.
Why Use Solana AirdropSender?
Solana AirdropSender is designed to make mass token distribution accessible and efficient, even for users without technical experience. Key benefits include:
- Ease of Use: Intuitive interface with straightforward options for CSV uploads and bulk token distribution.
- Transaction Management: Real-time tracking and status updates, ensuring transparency and control over each transaction.
- Retry Functionality: Easily retry failed transactions without restarting the entire process.
- Cost Efficiency: Solana's low fees keep distribution affordable, especially for large-scale airdrops.
Final Thoughts
With Solana AirdropSender, distributing tokens to a community on Solana has never been easier. The tool is perfect for crypto projects, DAOs, or any organization looking to engage users through token rewards. Get started today by visiting Solana AirdropSender and simplify your token distribution process.